Configuring your club, step by step
Your club is set up — what next? This is the order that saves the most work: first your club’s details and price lists, then groups, and invitations last. Every step has its own guide.
Screenshots
Where the club settings are
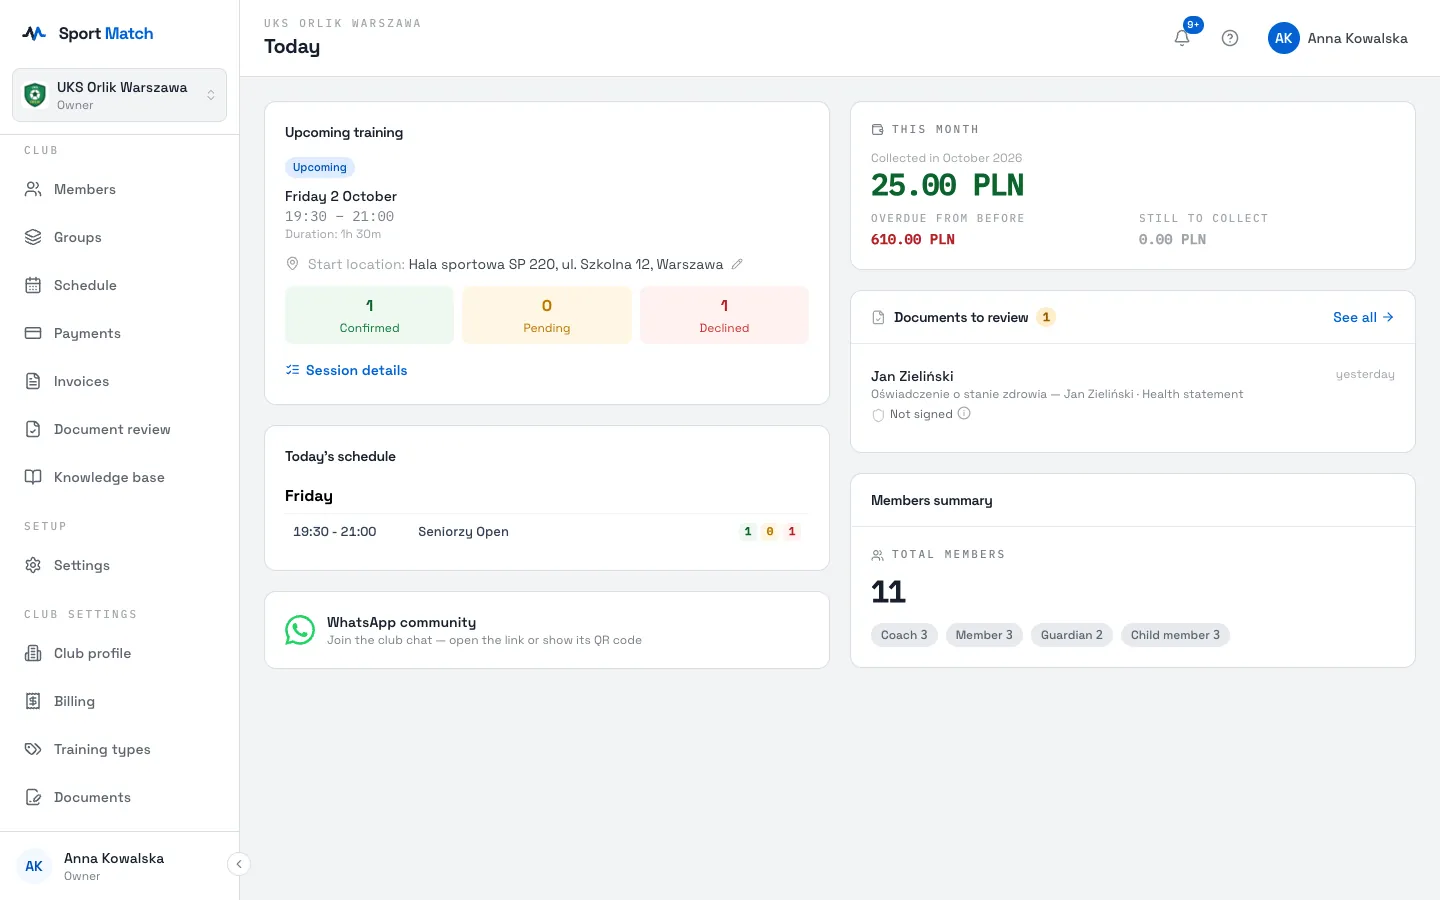
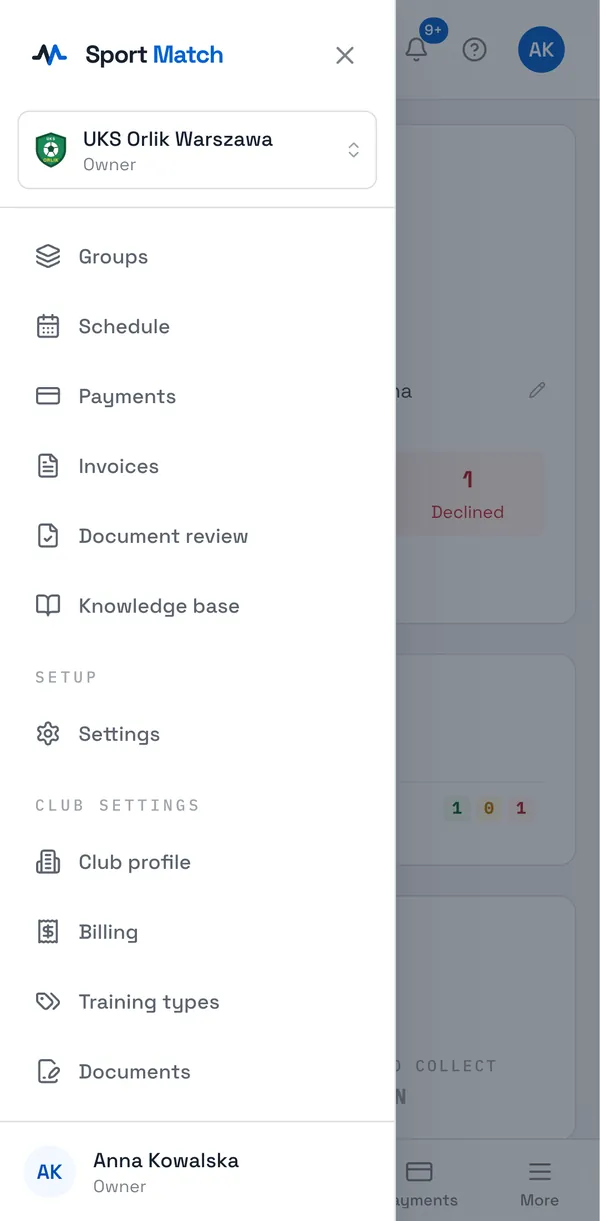
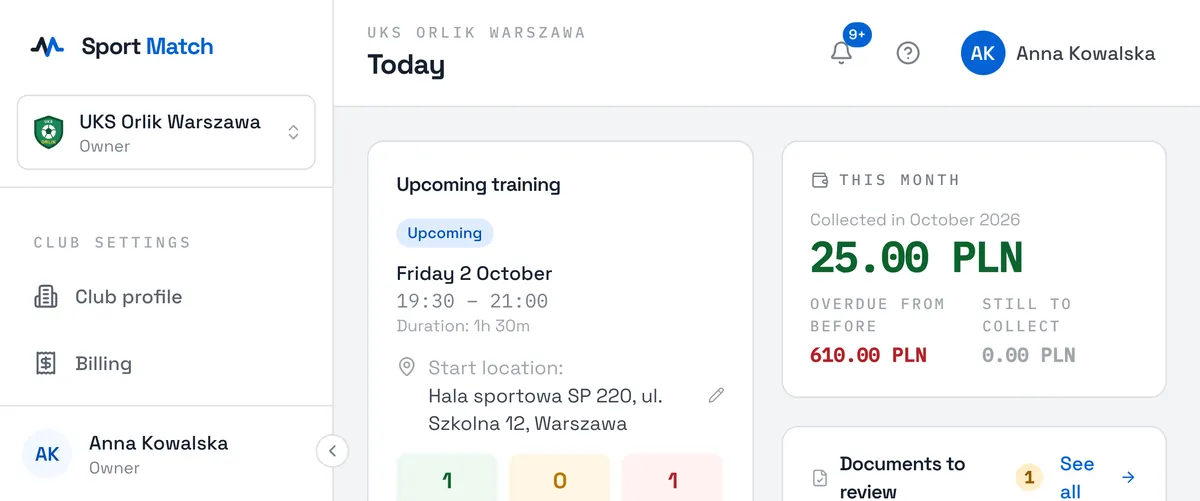
The Club settings part of the sidebar has four pages: Club profile, Billing, Training types and Documents. Only the club owner sees them. On a phone the menu sits behind More in the bottom bar. Settings on its own holds your personal settings: your profile and notifications.
The recommended order
-
Club profile — logo, sport, contact details and description. The logo also goes on every PDF generated for your club. → Club profile
-
Billing — payment recipient, bank account, VAT ID and the VAT settings for invoices. → Billing details and bank account
-
Training types — your price lists: subscriptions, pay-as-you-go, camps. Groups need one. → Training types and pricing
-
Groups — coaches, place, colour, weekly schedule and price list. The weekly schedule fills the calendar with sessions by itself. → Groups and weekly schedules
-
Invitations — the club’s join link or QR code, and email invitations. → Inviting members
-
Members, guardians and families — link children to their parents, assign members to groups, decide who pays for whom. → Members, guardians and families
-
Documents — which consents and statements members must hand in, and your form templates. → Required documents, Document templates
-
Knowledge base — your rules, what to bring to training, how payments work. Members read it in the app. → Editing the knowledge base
-
Payments and invoices — once members start paying: balances, cash payments, invoices. → Payments and member balances, Invoices
Tip: Before inviting everyone, invite yourself from a second address or one trusted parent, and check what the club looks like from their side.
Didn’t find an answer?
Write to us in the chat — it opens on this page, no login needed — or email contact@sportmatch.pl.